Wednesday, October 8, 2014

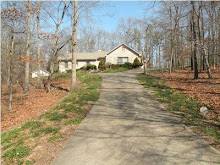
82.74 Acre farm for sale in Lamsburg, VA

So, here at the Herron's nest....I am posting a blog today for a friend who is trying to sell her farm in Virginia.
I grew up here in this area and so I can testify to it's beauty.
I didn't create the video below, but her friend did and so I will share it here.  If you or someone you know is interested in some acreage, this would be a fabulous location.
A stream on the property is stocked with trout annually by the state, there are around 60 acres already cleared for farming or pasture.  
It is approximately 2 miles west of I-77 at the NC/VA state line (Exit 1 in Virginia)
It's easily viewable on Google Earth if you type in Chestnut Grove Road, Lamsburg, VA...then use the pictures provided here in the blog to orient yourself on the street.


The above video was made a few years ago, not by me, so if you ARE interested, please use the contact information provided in the following listing.


Wednesday, August 13, 2014

Accessory Closet


In the wake of all going on in the world, I'm hesitant to even do another blog post.  Having shoes and purses organized is nice, but our sisters and brothers in Christ pray for a roof, food, and another breath of life....and they are starving, dying of thirst and becoming martyrs.  May God Bless them...


Sigh.  

39 feet of 1"x2"and 38 feet of 1"x10"...a box of wood screws and a little bit of paint is all that's needed for this project!  

I cut the 1x2 myself, but I figured the sizes of the shelves ahead of time to save time and energy for Greg....since I'm still a bit skittish of the miter saw.  Lowe's cut them all for less than $2.00

Here is the before...which was usable, but a typical jumbled mess.  


Once I pulled everything out, I realized the boards used to make these shelves were definitely an afterthought as the boards were seriously warped.  I ripped everything off the walls, spackled, sanded and painted the inside the same color as our master bedroom.  (I don't think I've done a post on the bedroom come to think of it!)  I love a clean, fresh palatte!


I found a can of oops paint (of course).  It was suggested by my sister to use a dark color for the shelves...since they are shoes and sometimes shoes are dirty :)  Great suggestion!  


Here's the final product of the closet...I didn't leave much room to grow...so I suppose I can either add a few shelves OR get rid of some shoes!  

What's that?  Why do I have hair styling things in my shoe closet?  OK, so my side of the vanity doesn't have an outlet.  Seriously.  So, I do my hair here.  The plan is to hang a styling tool holder here from Sally's....I just need to go get it!  Most worn necklaces and bracelets can go here too!  


Finally, a few dollars from ACE for a brace and about $10 from Lowe's for door pulls that match the vanity...I converted these ridiculous folding doors to French Doors.  LOVE them.  Folding doors are a waste of space. IMHO. French doors make the closet look bigger AND they provide hanging space on the back of each door.  (No I'm not a genius, I saw this idea on a small apartment living blog....)


Now, I can hang some scarves or belts on the back of these doors!!
What 'cha think??


Friday, June 27, 2014

Master Bathroom Re-Do Phase 1

It's been a while since I've updated our progress around here.  Between homeschooling, teaching at CSCC, writing my own book, and taking a class at LRU...I've been sort of busy.  In any time leftover, I have been working on the house.  The goal was to have all of the rooms painted before our first year was up...that actually happened!  Hard to believe we've been here a year...

If you don't remember what the master bathroom looked like when we bought the house...here it is.


Mauve and country blue....shoot me now.

Yes, that tub and all of the tile is PINK.  (They say "almond."  They are in denial.)

How can one comfortably "go" here?

Then the wallpaper starts to come down.  The good thing about this room was that it had probably been on there for 20 years and it peeled off in sheets in a lot of places.  Other places I used the fabric softener with hot water...and really didn't have any problem spots.  All walls washed and scraped for residual glue afterward.


Let the painting begin!!!  Well....wait a minute....
The worst part of this project: I did have a problem with the tan paint...After painting (literally) the entire room, this is what happened:

I couldn't figure it out.  I had painted another color over the tub...same exact paint (Valspar Ultra paint+primer)...same exact wallpaper, removal technique, etc., with no problems.  Lowe's was so kind to remix and replace it free of charge including a tinted Kilz primer.  I was totally willing to pay for the replacement, but they insisted!  And so the process of redoing the bathroom, turned into re-redoing...Greg powersanded the ENTIRE bathroom, I painted on the primer, and then painted a second time.  It looked great.  No problems.  It remains a mystery, but I haven't lost sleep over it.

 Anyway, here's the progress of the wall...love the burgandy...By the way, while trying to get to the corners with the red above the tub, I tried to get all inventive without Greg around and I totally fell off the ladder. (A step ladder that I rigged to stand on top of a sanding thingy that was on the side of the tub.)  Marli came running when she heard me yell and crash...I was actually stunned into silence for a few minutes while lying there all upside down in the tub..making sure I didn't have any broken bones.  Thankfully, I was only bruised and sore for a few days.  Lesson learned...

 Look!  No wallpaper!!

And here are the after pictures for this phase:
Burgandy paint $5.00 oops paint.  Curtains at Ollie's were $6.00 each....because they'll be replaced after phase 2.  

Greg built the frame for the mirror because the previous owners used some heavy duty glue.  I was really afraid of breaking the mirror while trying to remove it, and I kinda like having it...

This is still very plain b/c I need to decorate....but the hubs built the shelves out of repurposed wood from....(I can't remember.  Somewhere in this house!)  And we spent about $12 on the moulding. 

I love the vanity.  It took about a month to do...but it was worth the time and effort.  We will replace the carpet in the next phase and take care of the color of the toe-kick then.  I'll also replace the counter top and sinks (the faucets were just replaced b/c they were leaking...)  $75.00 for stain and supplies...don't skimp on buying stain.  Get the good stuff!  
Here's a close up of the colors.  The main wall paint (tan color) was $20.00 for 2 gallons.  You know me.  I typically only buy the oops paint and "make it work"....in the words of Tim Gunn.
PHASE 2 PLANS:
Remove the tub...
Remove the carpet!
Hang Wainscote around the alcove (where the tub is)...add baseboard and chair rail.
Thinking I'll do that around the wall behind the toilet too...
OH and of course....turn that closet into my shoe closet!! (I'm working on that now)
I'm looking at something like this for the flooring
What do you think???


PHASE 3 will be hiring someone to come and tile the shower/potty area and then Greg and I can replace the toilet ourselves...


Thursday, February 13, 2014

The Dining Room

This was actually the second room I painted (after the foyer).  BUT, I didn't want to post anything until we changed out the 1980's light fixture....ok the house was built in 1992...bottom line, it needed to be replaced.


I don't really have a "before" except of the fixture...the room was just the same color (flat creamy color) as the rest of the house...this is the view from the kitchen and you can see the older style brass/white fixture.

 AFTER:  Greg found this fixture on Craigslist for $15.00!! The Kentucky Farm Print is centered between the wall and the door, so it looks off center from this angle....we weren't sure of the decor rules...We are currently looking for a piece of furniture (buffet, credenza) to go under the print to transition our home school room to this space.  (hope to update that in the summer)

Below: We are/were collectors of Hull Pottery (in the case) and Hoffman Pottery on top of the case.

When I painted, we had vertical blinds that I knew wouldn't go back up.  The "problem" is that these windows are not standard size, so I'm shopping around for window treatments for this and all rooms previously posted :)
But check out the view!!!  (i.e. the snow)
Yes, those are fish on the table: Wildcat and Corral...Beta fish...and that's also Hull Pottery (Avocado) salt/pepper shakers and a butter dish in the middle of the table and the tea pitcher on the side table. 

Have a fantastic day!
Jana


Wednesday, January 1, 2014

The Guest Room

The Guest Room Reveal...

The before and after of this room seriously motivated me to do our own bedroom.  The cornice boards were probably beautiful in their own time, but 20 years later, they had to go. 

I feel like the room is open and inviting now that it's complete, I had to stop each time I walked by just to say "I can't believe how different this room is!"  To give perspective, it's about 18x14 (18 ft from the door to the window)

The room looks out into the backyard...

BEFORE...
.

AFTER!!
Question: Valance or no valance?  I sort of like it like it is...

The closet is actually a craft space.  My sewing table was the perfect size and there are built in shelves in it.  SO, one of these days (years probably), I will spend time on the craft closet.  

The room color is actually very different from the hallway, you just can't tell in the pics.  The hallway is much lighter than this room.  The color for the guest room is called Timberwolf gray and it's from ACE hardware. (Caution: Timberwolf has a lot of violet/fushia in it.  It worked for this room, but in a very light room it may have a purple tone...I would definitely do a sample of this one before buying 3 gallons of it....trust me.)

This room also doubles as a "study".  

Have a blessed day!
Jana

The Firepit!!

HAPPY NEW YEAR!!  Welcome to 2014 and I hope it's a blessed one for you!  We have been crazy busy with homeschooling, sick kids, sick mommy, out of town a few times, updating stuff around the house, and I made a B in the class I took last semester at LRU (it was Introduction to Old Testament)...and I decided to change programs and now my B won't count for anything. (blah...) But anyway, it was a good starter class.
I have so many updates to tell you about, but I'll continue to do just one at a time.  I will update several before school starts up again and then I'll go back into blog-hibernation until spring.  We've completely redone the guest room, I painted the master bedroom and the living room!  It looks SO good, but I'm still decorating and trying to find great deals for the wall decor.  Greg literally just pulled in with paint for Marli's room....and there is stuff on the Master wallpaper now so I can start pulling that off asap!

Here ya go!

During October, we really wanted to use some of the materials left here (cinder block, brick, etc.) to build a fire pit.  We have future plans for the deck, garden area and the fire pit will be at the edge of a stone patio...(who knows when that will happen.)  And by the way, this winter garden was a total fail.  UGH!  I'll try again in the spring.
 Greg dug out and leveled the ground before pouring a footer for the cinder block...you can sort of tell it's at the edge of the garden area.

 We tried every way possible to maximize materials so we wouldn't have to buy more, etc and then it would be a project where we only would have to buy concrete for the footer and mortar for the brick.  Once we started trying to figure out how to lay brick, watching Youtube videos, etc...He decided to hire someone for the brick work.  Greg did everything up to this point.


A retired mason "Mr. John" came over and had this baby done in ONE afternoon, minus the top.  He hap to do the top the next morning.  (Below)

I love it!  We had a small group gathering at our house with about 30+ people and it was a huge hit for s'mores and just to keep warm on the chilly night.
So here it is cleaned up a little with an insert.  Rather than build the fire inside, we chose to get a cheap insert to keep the fire a little higher, but also for ease of cleaning up.

The area in the foreground here will be the future stone patio...


Saturday, November 16, 2013

Shut the Front Door!


One of the items on the "to do" list this fall was to paint the front door.  The house needed color inside and out....it was easier to paint inside when it was blazing hot.  Last weekend it was a beautiful 65 here and I found a $5.00 can of "Oops" exterior satin paint at Lowe's!  So, the front door was the recipient of my bargain. 

 
Because of the previous color, it took 3 solid coats of paint and still needs a little touch up with a small brush, but I'm sure you wouldn't notice those places unless you looked really close...I still have enough paint to do the side door by the garage!  That may need to wait until spring though, I'm not sure I can tolerate the temps to paint outside right now. :)
 
We are painting the hardware this weekend (well, Greg is) to match the future color of the shutters.  They will also get a good overhaul in the spring.  Here's a reminder image of the house before the door was painted.
I'm thinking dark chocolate shutters with the burgundy(ish) door???


Here's a close up of the wreath.  Yes, I made it and I have plenty of materials left to make you one too!  Now that I see it, I don't think I like the ribbons that are hanging down...

Have a great day!

Jana